Welcome to Moda Fabrics!
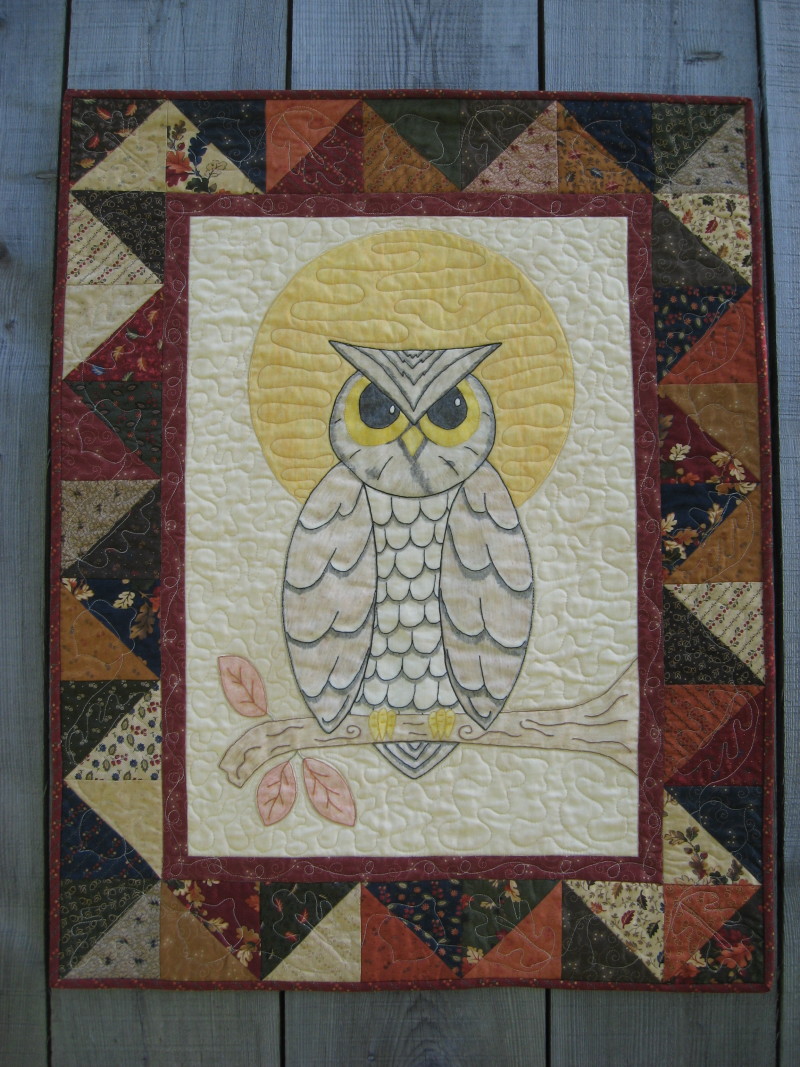
Levi's Hoot Quilt
Levi's Hoot Quilt
Levi's Hoot! is a small quilt measuring 28" x 36" finished. It is done using the Crayola crayon tinting technique and is fairly easy to master with beautiful results! You can visit my blog site at byyourlightdesigns.blogspot.com to see other projects I have completed.
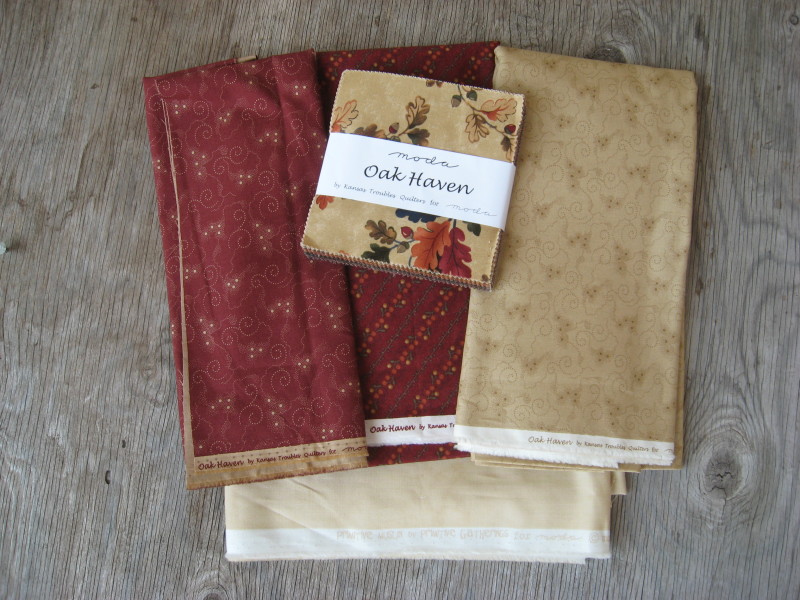
Oak Haven by Kansas Troubles
1- charm pack (9520PP) half square triangles {Oak Haven by Kansas Troubles}
1/4 yard- red swirls (9527 13) border
1/2 yard- cotton vine red (9523 13) binding
3/4 yard- primitive muslin pie crust (1040 22) background fabric in center
1 yard- tan swirls (9527 11) backing
Notions: Batting, Box of 64 Crayola Crayons, Extra White Crayola Crayons, Brown 01 PIGMA Pen, White Paper Towels, Very Fine Sandpaper, DMC Floss (301, 310, 433, 742, 3011, 3820, and 3852)
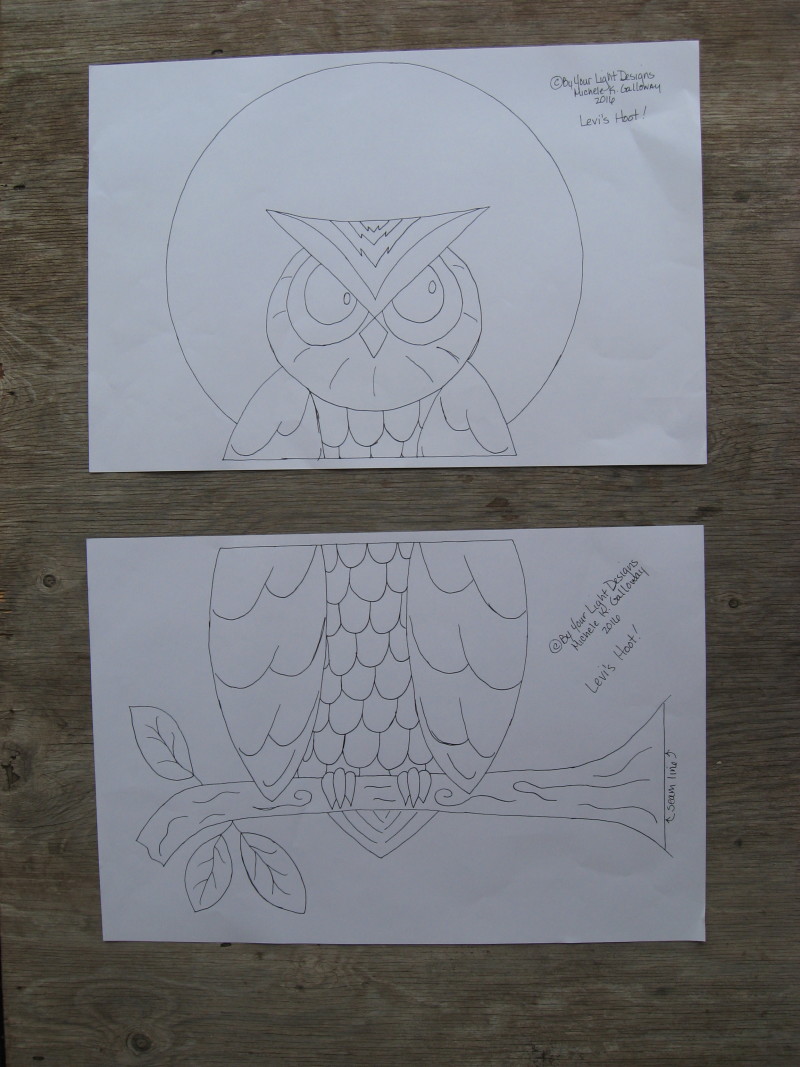
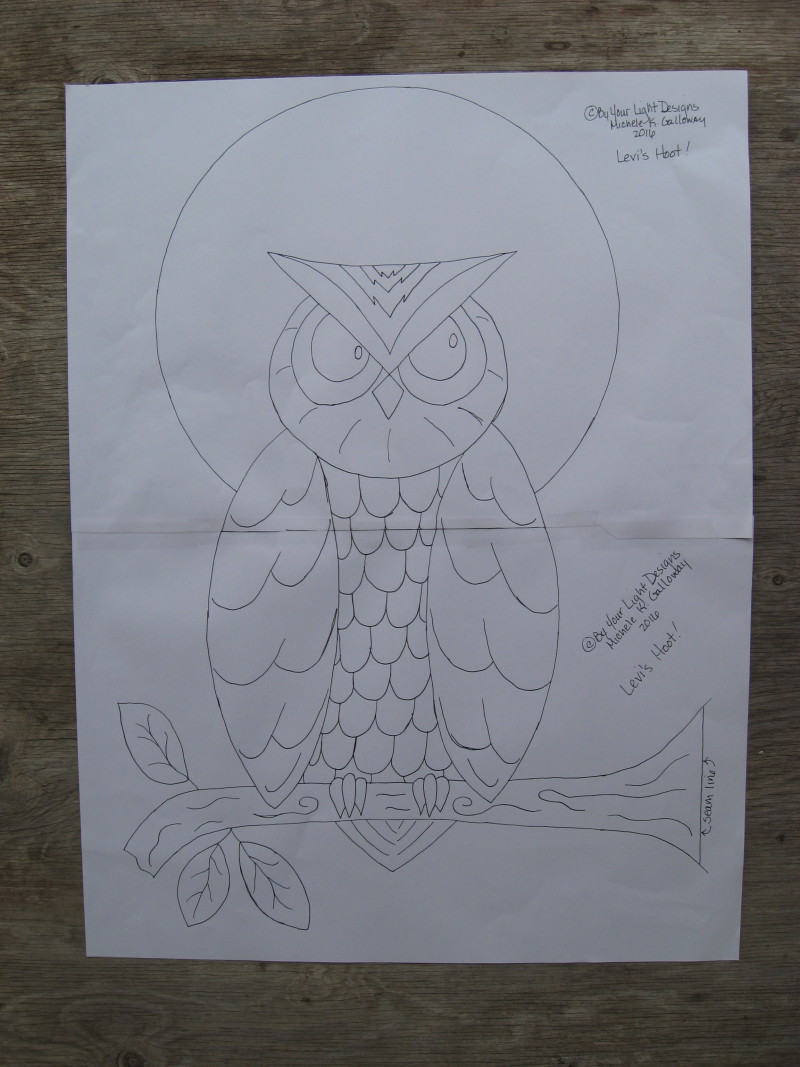
Download the template pages {here} and print them. You will need to send the file to a copy shop to print them at the 13"x9" size used in this pattern. You can print at home and make a smaller version of the owl by scaling the template pages to fit on standard 8.5" x 11" paper. If you choose that option you will have more negative space around your owl in the center panel.
Match up the two sheets of templates and tape together.
Take the center background fabric and square it up to 28 1/2" x 26 1/2". Lay this fabric, right side up, over top of the pieced pattern and pin in place. Trace the pattern using a Brown 01 PIGMA Pen, using a light box, or a large window works! Extend the branch all the way out to the edge of the fabric. When finished, remove pattern and press image with a hot iron (NO STEAM) to heat set the image. DO NOT skip this step.
Color the entire image with White Crayola crayon, being careful to stay inside the lines. You will need a nice thick coat. If you place the fine sand paper underneath the fabric where you are coloring, it helps to keep the fabric from moving and makes it easier to color. You can color over top of the lines inside the pattern, just be careful not to color outside the outside line. Make sure you color past the seam line on the branch.
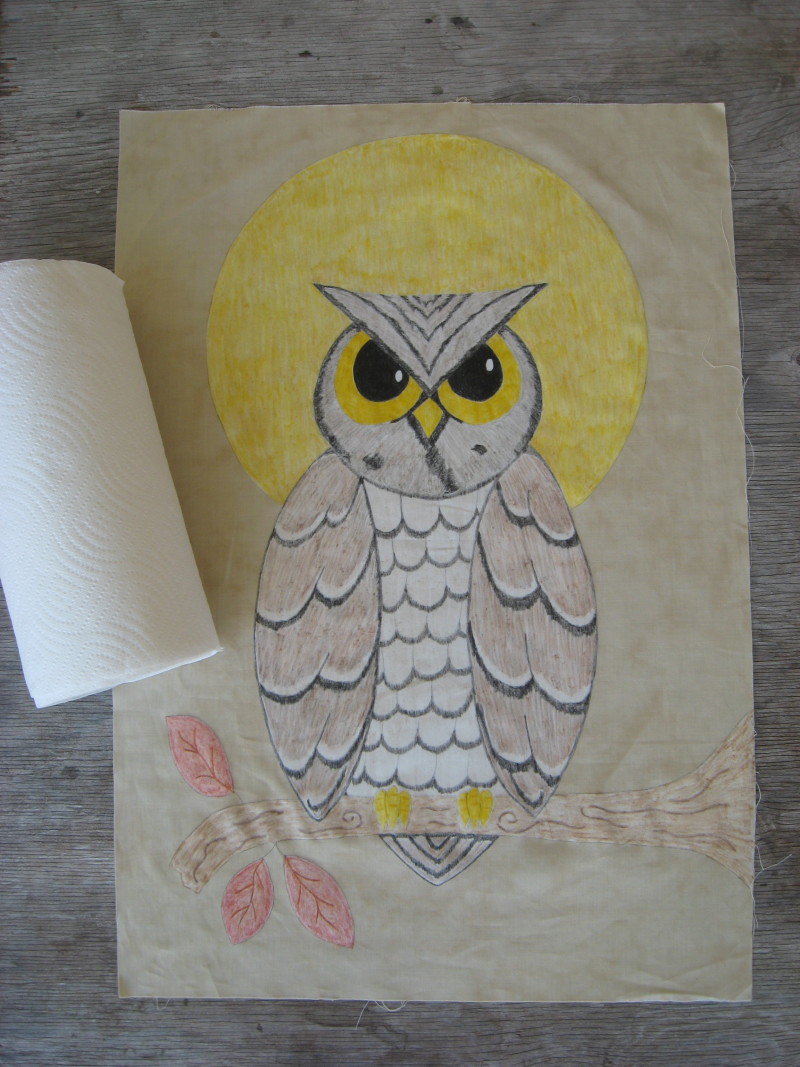
You are now ready to tint using the colored Crayola crayons. This is done by coloring over top of the white, shading the color to your liking as you go. You can pick your own color selections, or use the ones I did.
Eyes- outside section- Golden Rod, Black pupil, leaving the small circle White for a highlight.
Beak- colored with Dandelion and accented with Goldenrod.
Head- shade a darker Black around both sides of the head down to the center top of each wing. Continuing with this, shade around the entire beak, spreading out under each eye and then down the owl's face with two other random Black shaded areas also on the face. For the top of the head, shade a darker Black again on top of each line. Now tint a much lighter Black over the entire face and head. Taking Sepia, tint lightly over top of what you just did, ending with a light coat of Brown over that.
Wings- do the same as the head. Shade a darker Black underneath each feather on the wings and towards the outside of the wings, with a lighter coat over the rest. Leave a small section above the dark shaded area White with NO other color added to it. Again use Sepia and Brown as you did above.
Chest Feathers- shade underneath each feather with Black leaving the rest of the feather White.
Tail- tint under the branch and underneath each tail feather line with Black, repeating the same sequence of colors (Sepia, Brown) that you used for the head and wings.
Feet- tint both feet with Dandelion accented with Golden Rod.
Tree Branch- highlight under the branch lines with Sepia. Tint the whole branch with Raw Sienna adding a light coat of Sepia over top for shading.
Leaves- highlight the stem lines with Mahogany and shade out into the leaves away from the stem lines also. Shade the whole leaf with Brick Red and then add a light shading of Mahogany over that.
Moon- base coat the whole moon with Dandelion. Add some Golden Rod over that and highlight areas with Yellow Orange till you get it how you want.
If you have made any mistakes with your coloring, now is the time to fix them. It will be to late to fix them after the colors are heat set. There are two ways to do this:
- Make a paste with Baking Soda and water. Rub the coloring mistake using a Q-Tip and paste until it disappears. Rinse that area only with clean water and let air dry.
- Dab the mistake with removable mounting putty (stuff that hangs posters up) till it comes off.
You are now ready to make the crayon permanent! To do this, place a piece of white paper towel over the section you are going to press and using a hot, dry iron, PRESS that section only! DO NOT IRON, PRESS!! Be careful the iron doesn't go off the paper towel. Do this until NO color comes off on the paper towel. Use a clean piece each time! Keep at it until the whole image is pressed and no more color comes off.
These next steps you can do in the order of your liking. I added the 1" border before I started the embroidery. Cut 4- 1 1/2" strips WOF for the border. Attach the border to each side of the quilt first and press seam towards the border. Cut off excess. Make sure you use a piece of white paper towel over top of any colored area, just I case you didn't get it all of the first time around! Next, add the top and bottom borders and press the same way, cutting off the excess.
Embroidery- I did not use a hoop, but you can! I used 2 strands of DMC Floss and the Back Stitch for all stitching done. Complete in any order you like!
301- leaves (outside lines and inside stem lines)
310- pupil/highlight, head/face, wings/feathers, and tail
433- tree branch and lines on branch
742- moon
3011- stem from leaf to branch (not inside the leaves)
3820- eyes and beak
3852- feet and highlights on them
Press piece from the back with a terry cloth towel under it so your stitches don't flatten out!
Half-square Triangle Border- (picture above) match two 5" squares with right sides together. Draw a pencil line from corner-to-corner on the back of one of the squares and sew a scant 1/4" seam on both sides of the drawn line. Cut on the pencil line and press each half-square triangle open. Trim each one to a 4 1/2" square. You will need 28 half-square triangles. I used all the squares in the pack, so I ended up with 42 half-square triangles. I used one of each combination and then chose 7 more of my favorites for a total of 28. Make 4 rows, using 7 half -square triangles in each row. Sew a row to each side of the quilt first, press seam and then sew the other rows to the top and bottom of the quilt, press.
Sandwich quilt (backing,batting,and top) and quilt as desired.
Binding- cut 4- 2 1/2" strips WOF. Trim selvage off and sew end-to-end using 1/4" seams. Press seams open and then press binding in half, lengthwise. Attach to quilt.
This quilt finishes at 28"x 36".
I hope you enjoy making this as much as I have enjoyed creating it!
Check out my blog site at byyourlightdesigns.blogspot.com and follow along! I will be giving updates as to when my web site will be up and running!
Michelle Galloway
{byyourlightdesigns.blogspot.com}


